Sep 2020: The Art of The Day We Fought Space, From Sketch to Sprite
Hey there! It’s Susan, pixel wrangler aka artist here at Tursiops Truncatus Studios. I am taking over the blog for a bit to talk about my process for making the art for The Day We Fought Space. Specifically how I made the spaceships for the game.
Part One: Ship Beginnings
Step one: Planning and Inspiration
First step when coming up with the ships was planning what they would look like. When Catherine and I first sat down to discuss TDWFS we knew we wanted it to have elements of campy sci-fi, mixed with a comic book aesthetic. We also discussed how the mysterious entities you fight in the game utilize both mecha as well as organic parts in their ships. Keeping this in mind, I looked to both old and new science fiction as source material. I also was very inspired by the natural world, especially by aquatic life and insects. So if any of the ships look like it was something you might find swimming in the ocean or buzzing through the air, there is a reason for that!
Step Two: Sketching
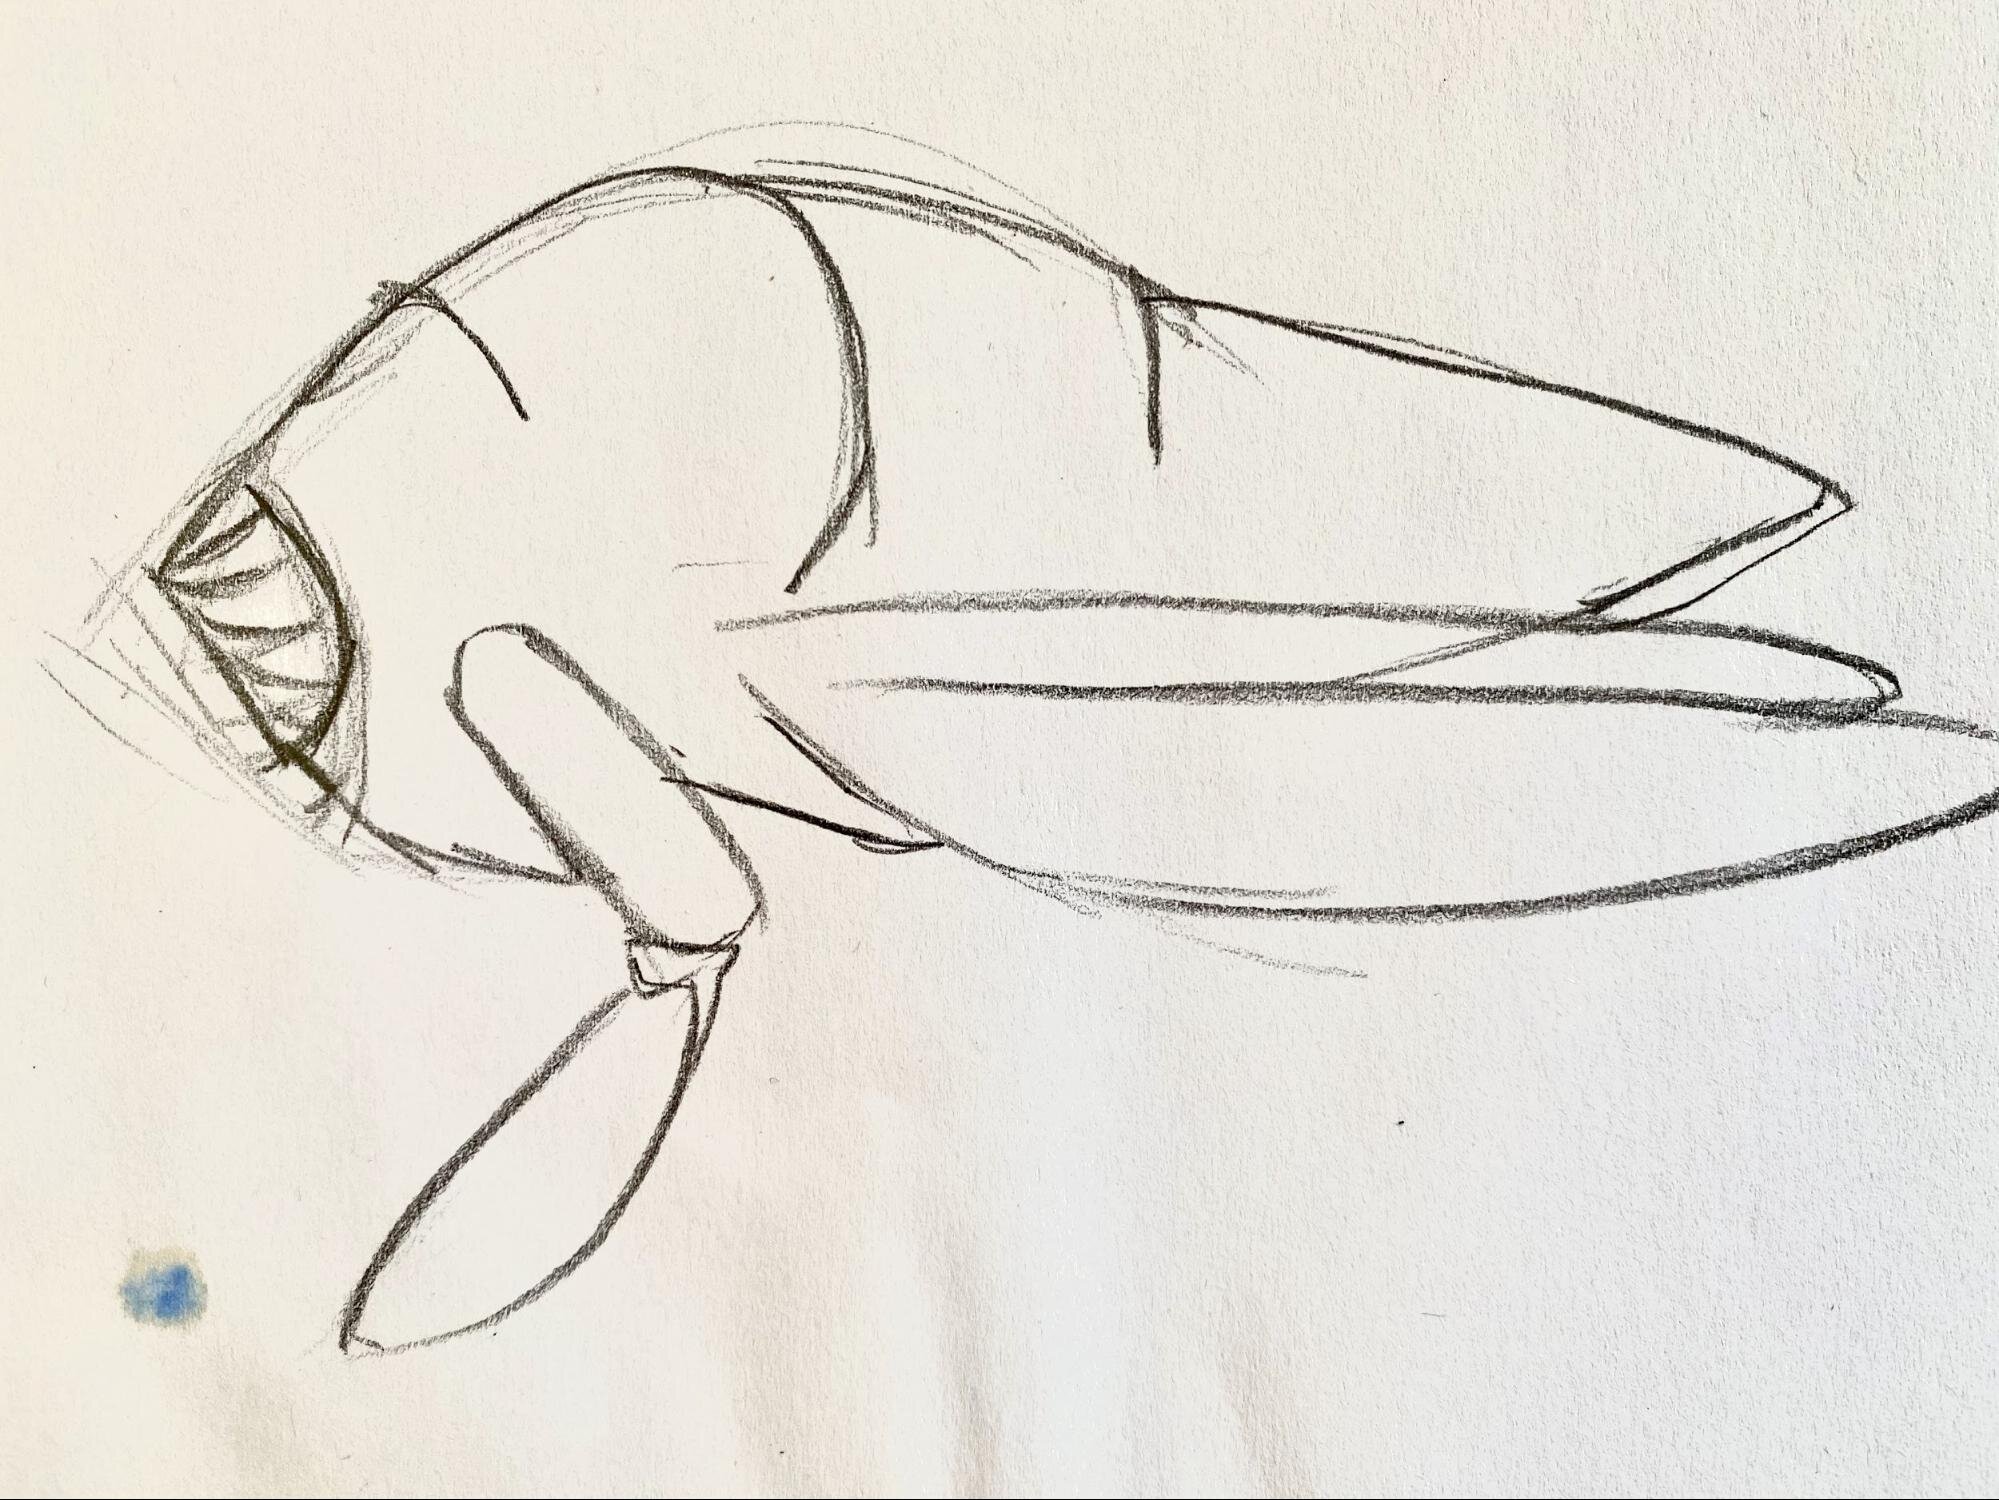
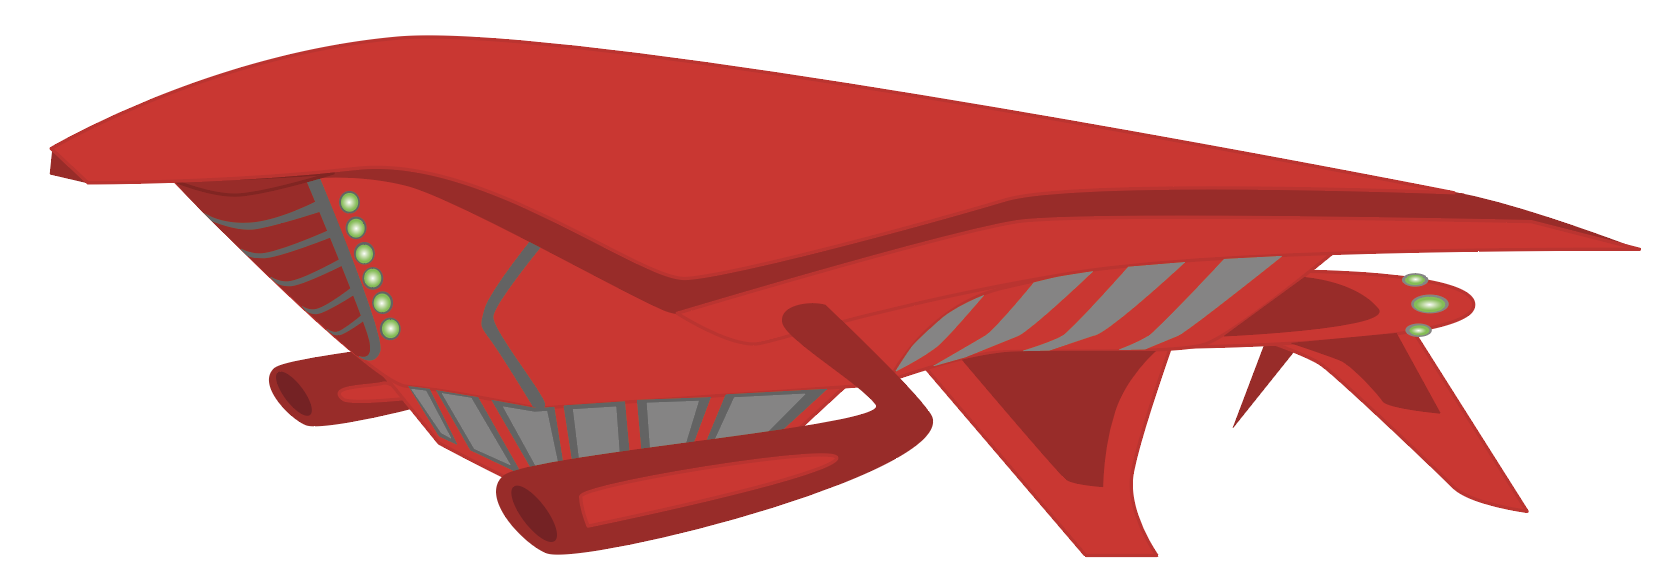
Next step in the process is to sketch out my ideas. Normally when I sketch, I use a few different references: different spaceships I found from shows/movies I thought had good elements, real life planes, or maybe submarines/other watercrafts for dimensions and shape. I will also use photographs of insects or other real life creatures to draw from. For the ship we have nicknamed “Big Guns,” I used cicadas as my reference point. When sketching, I use both an ebony graphite pencil as well as a mechanical pencil - which is what I usually use for my initial sketches. I will start out with some loose drawings to get an idea of the shape I want as well as details of parts that I am particularly interested in utilizing in the final creation - such as the cicada’s strange mouth area, called a clypeus.
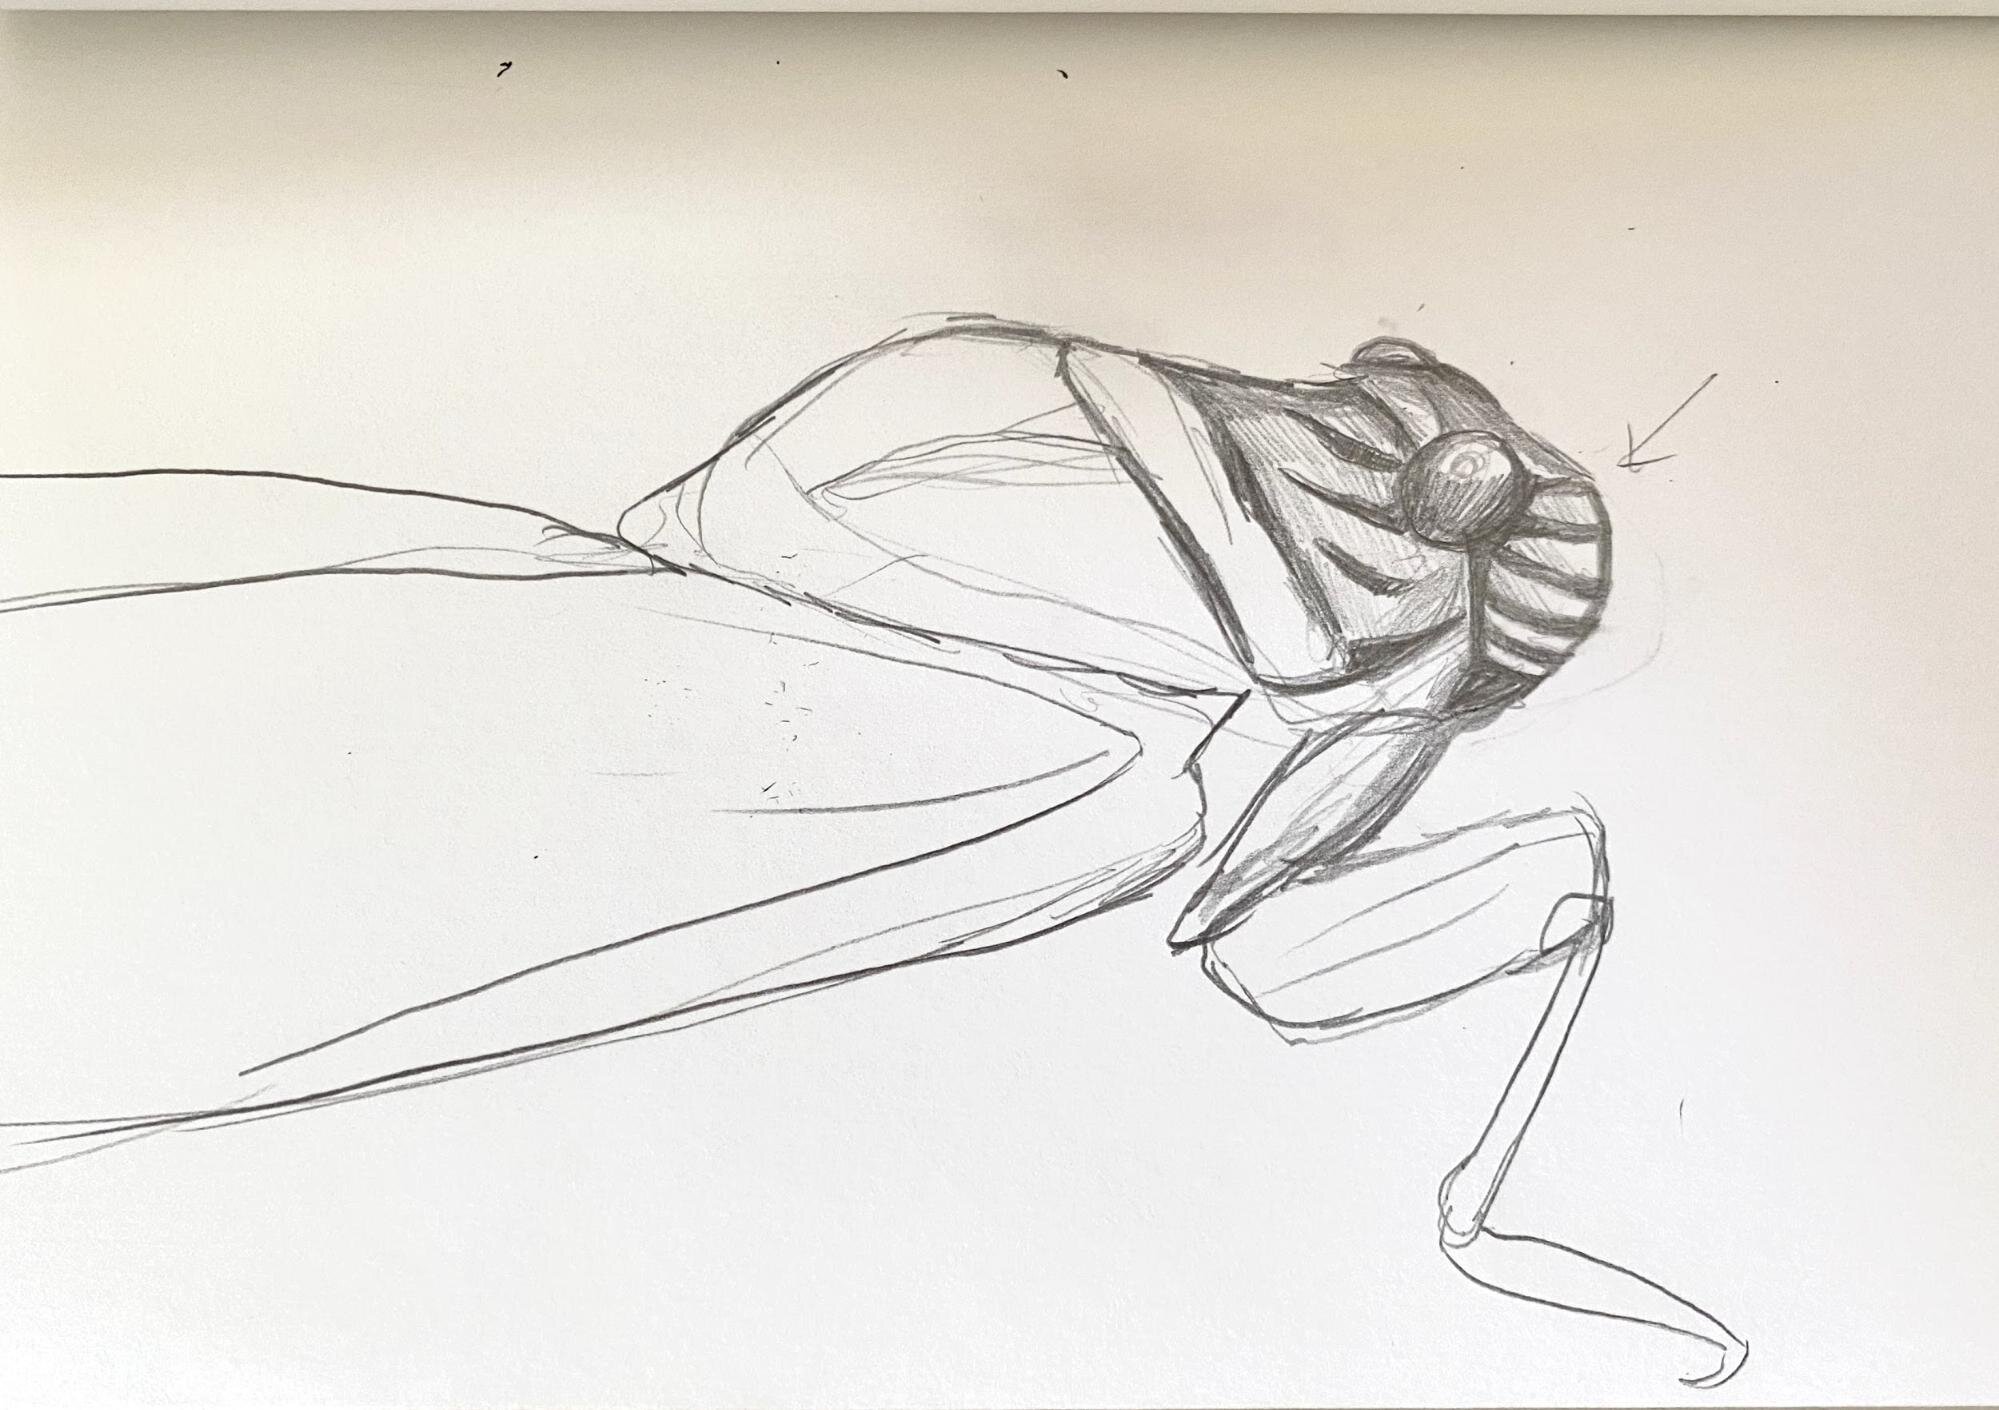
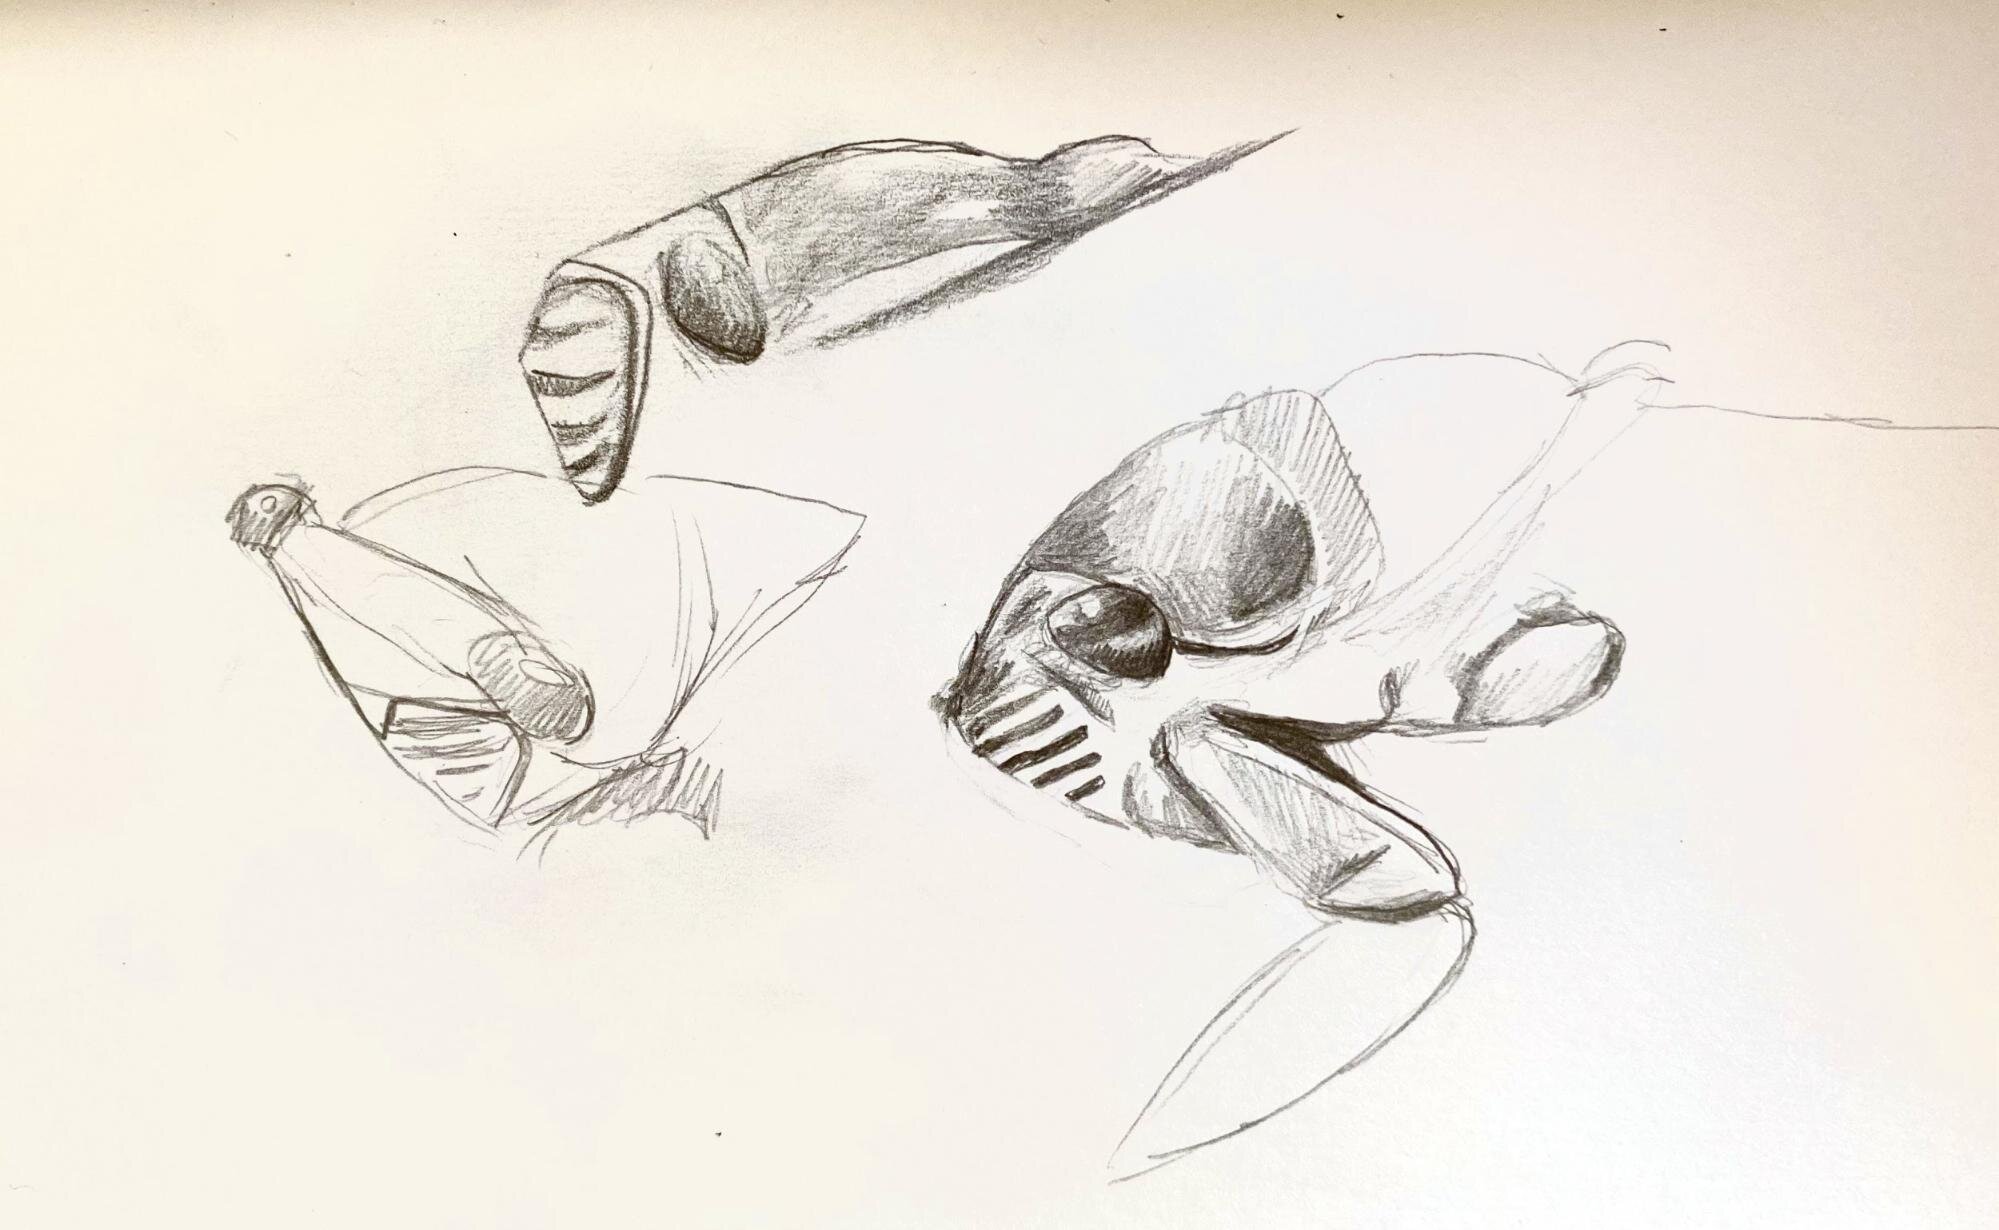

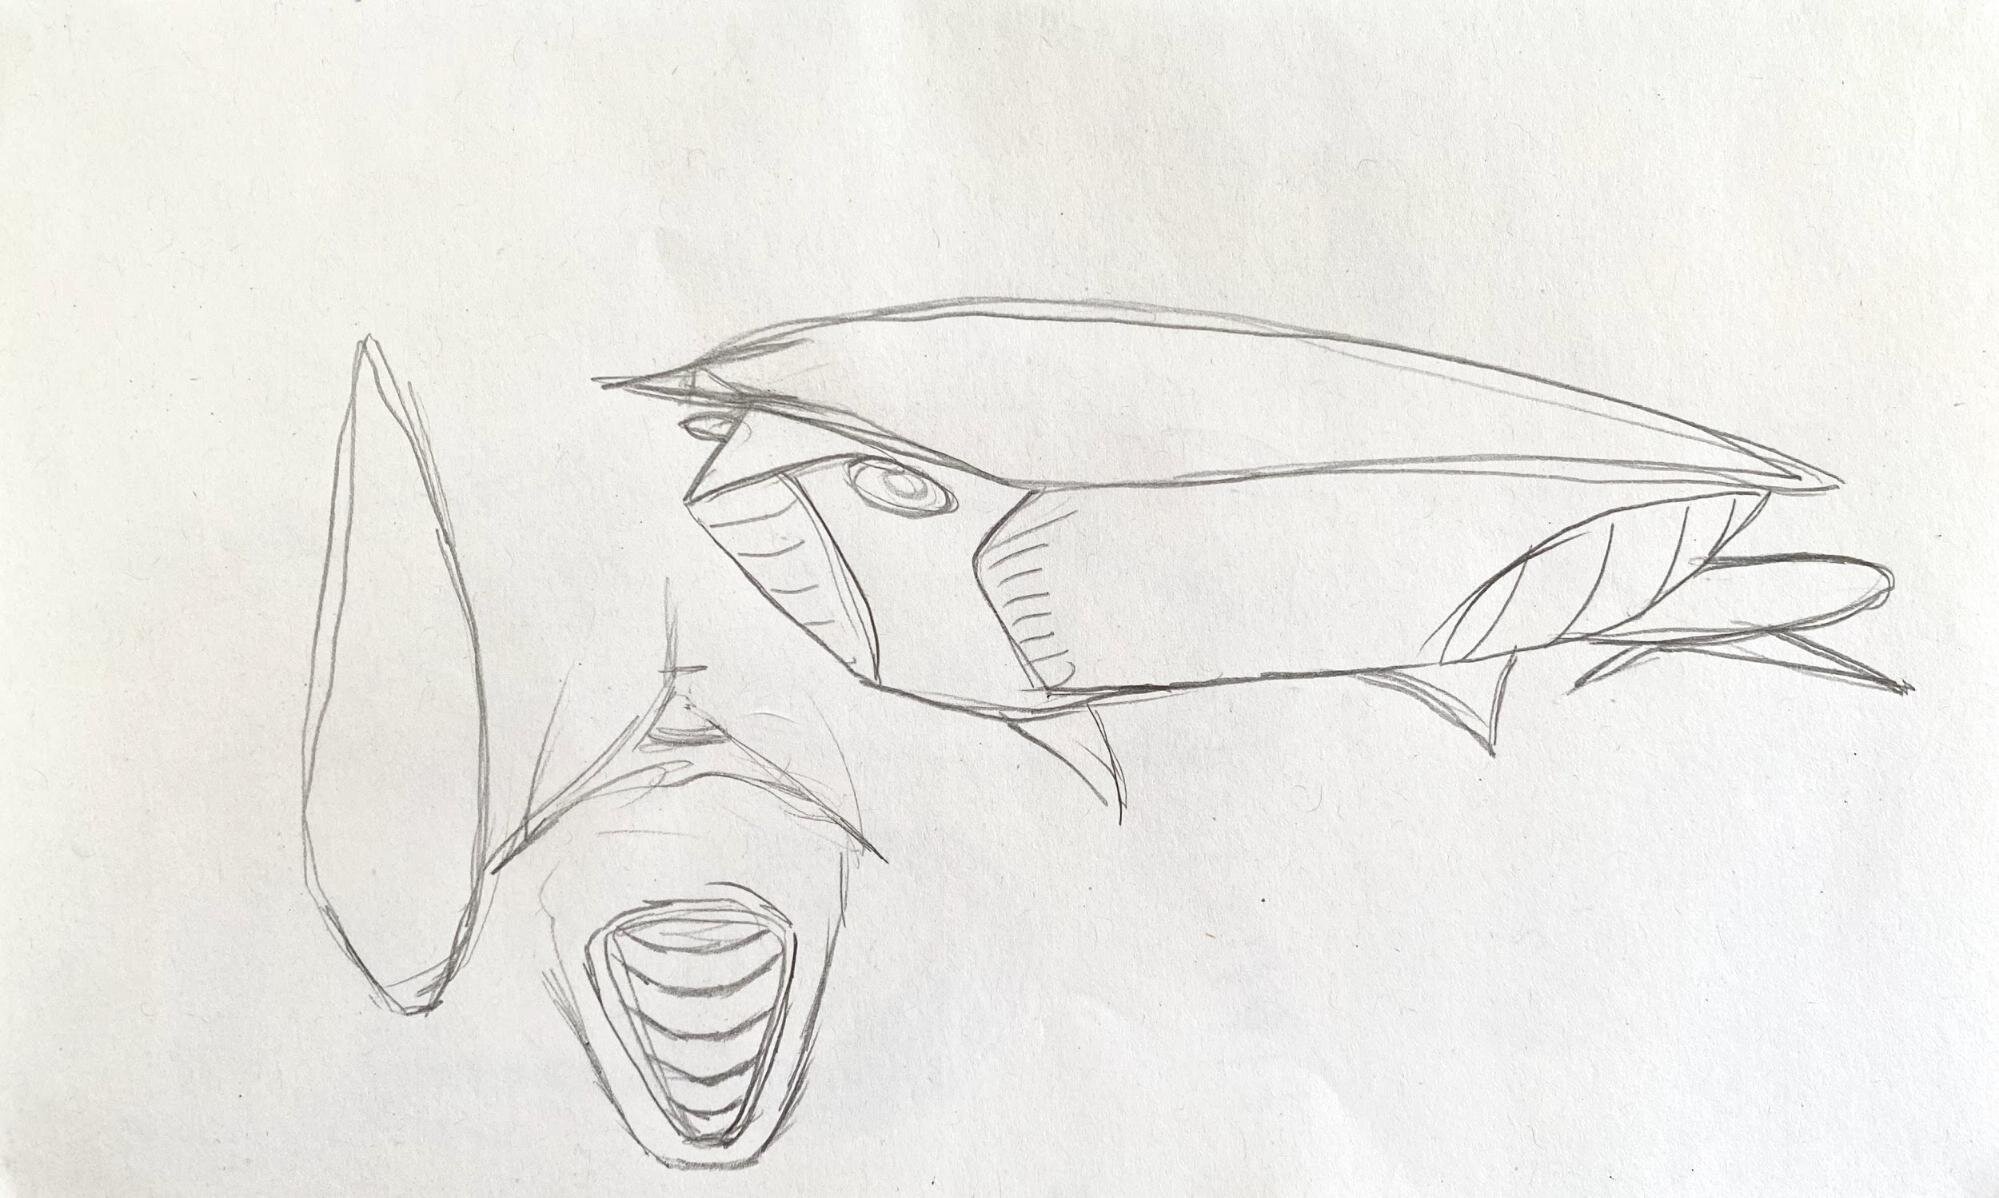
And then the final sketch, where I start to combine parts from my sketches, and solidify what the ship will look like as a final piece.

Final “Big Guns” drawing
Step Three: Illustrator
Next I will scan my sketch, and place it in Illustrator where most of the work happens.
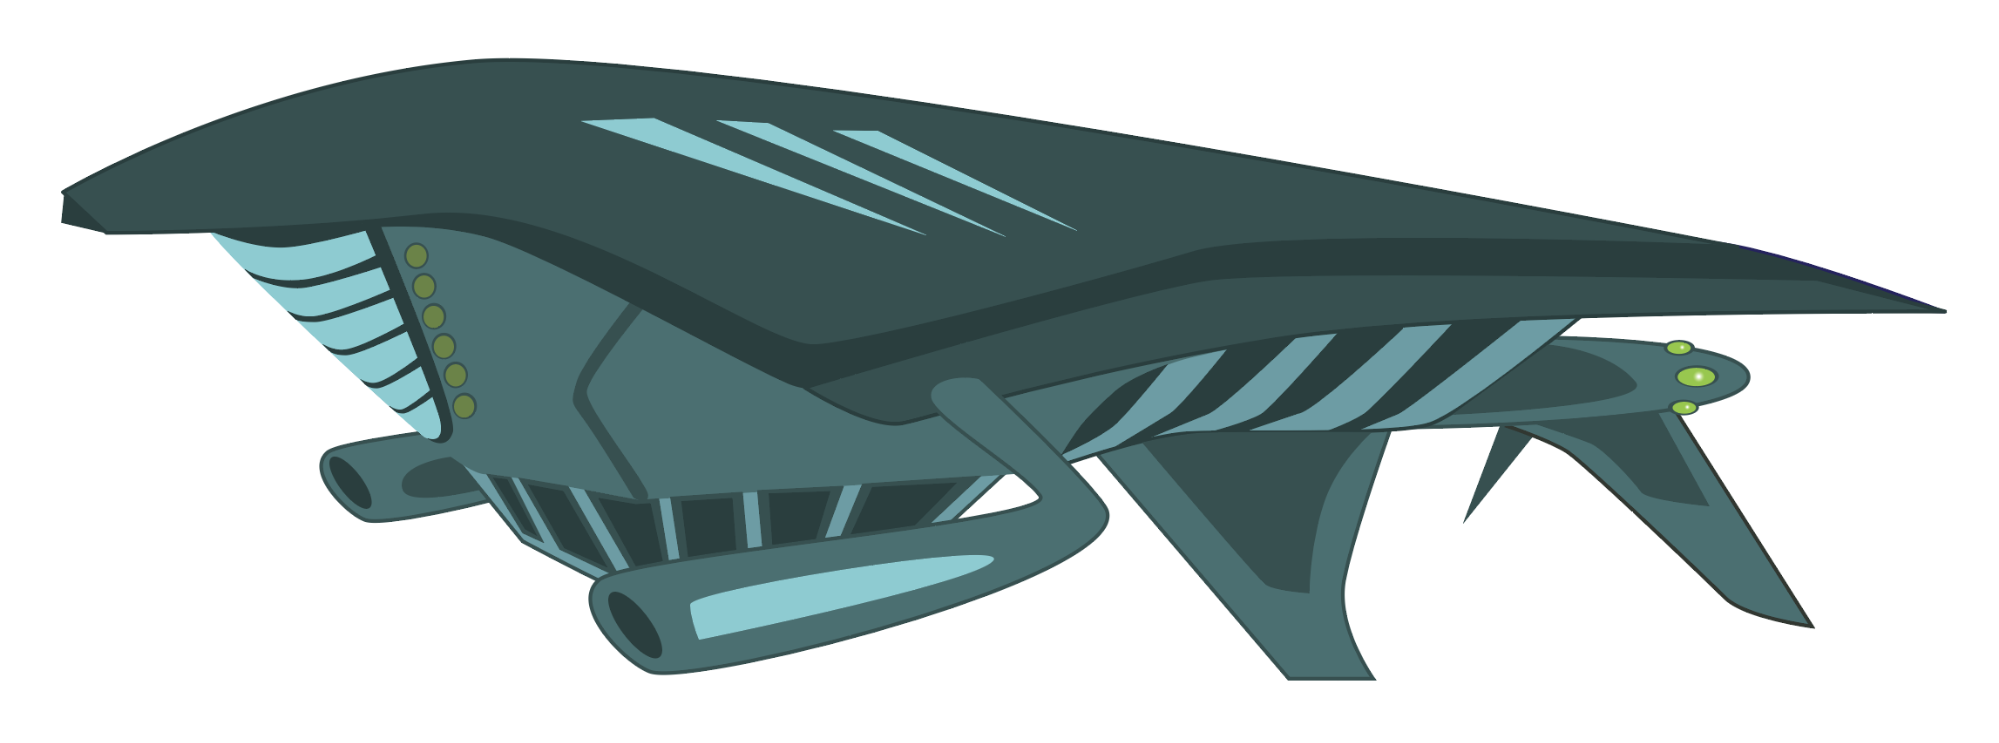
I began by outlining the ship from the sketch. I utilize a number of tools in Illustrator to do this, using a combination of a tablet and mouse to “draw” with, and my usual go-tos are the Pen and Pencil tools. Sometimes I will start with a loose Pencil drawing, and then go back in to clean up the shape with the various Anchor Point Tools. Other times I will need to be more precise from the beginning and start with the Pen tool, adding and subtracting points with the Anchor Point Tools. Then, I work in greyscale, creating blocks of color to give the illusion of depth, shadow, highlights as well as add on any other parts I think would look cool on the ship (such as the big front shooters and flashing lights you see on the final version of “Big Guns”).

Grayscale Illustrator Vector
Then I add color.
First color version (when I first designed this ship we had not decided on a color theme for the levels yet).
Each level has a color palette that each ship needs to adhere to:

So the next step is to create a few versions in different variations. I play around with different shades of the same color as well as adding accent colors from the palette to see what works.


Once I have a few ships in the different colors that work well, I save a final version. I save many versions, I have learned from the mistakes of my past - too many times losing progress on a project when something goes wrong with the computer, as well as finding something worked better in a past version and wanting to go back to that. Then I send the files to Catherine where she does her magic to them!
In part two I will explain how we took these first drafts and changed them up to have a more comic book style.